

Interpreting the Calibration Test
How to Interpret Calibration Time
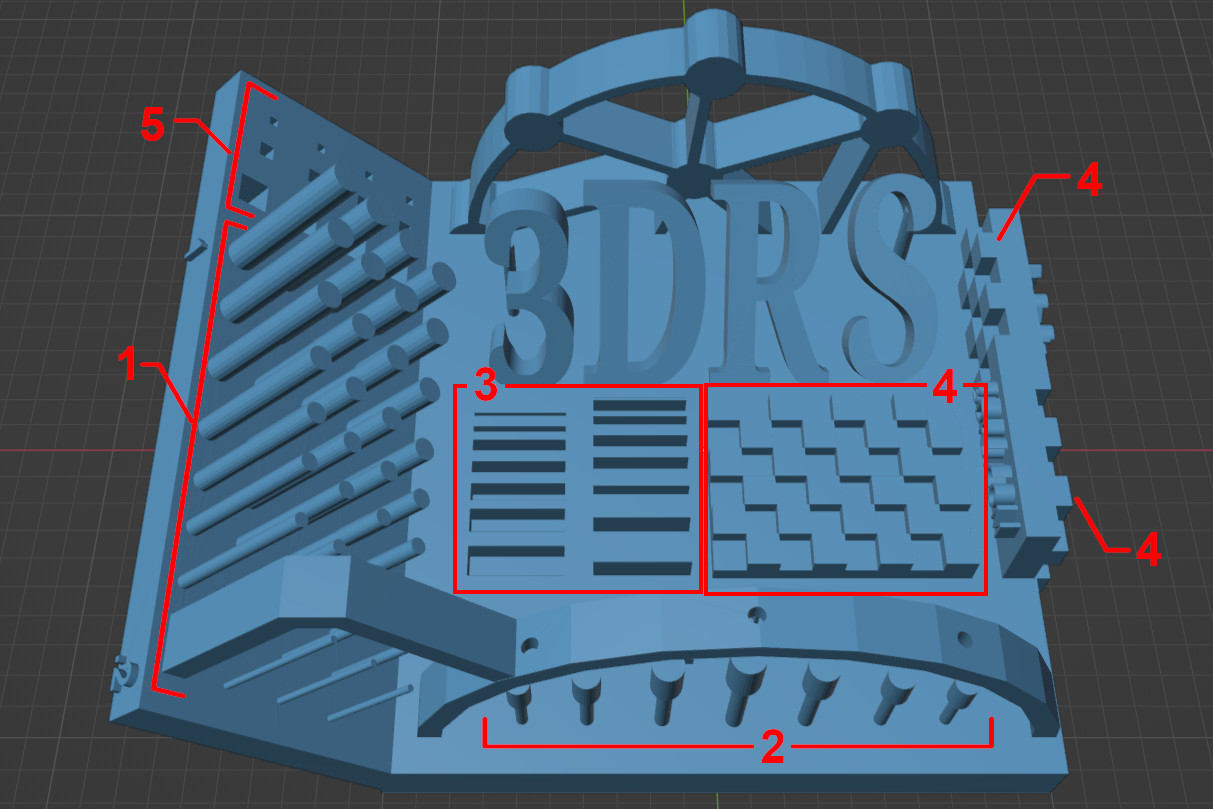
Test #1 - Pillars: The 9 columns of pillars range in size from 0.2mm - 1mm. The pillars help determine the strength of the material, as well as the required size of your support structures and tips for the resin you are using. For tough or flexible resins, we like to see at minimum pillars 0.4-1mm print successfully and hold their form. For rigid resins (standard, high-detail, fast), we like to see at minimum pillars 0.3-1mm print successfully and hold their form.
Test #2 - Hammers: The hammer test helps verify your settings are adequate enough to develop the required tensile strength and layer adhesion. Pillars range in diameter from 0.35mm to 0.5mm. We recommend finding the lowest possible exposure time where all hammers print.
Test #3 - Basic Accuracy Test 1: This test includes 7 rectangular shapes with widths of 0.1mm, 0.2mm, 0.4mm(x2), 0.6mm, 0.8mm, 1.0mm. Overexposure will result in these areas partially or entirely closing. If your 0.2mm or 0.4mm rectangles are not visible, reduce the exposure time to help increase the detail of your prints, but do not reduce to the extent that tests 1 or 2 fail.
Test #4 - Checkerboard: This test includes a checkerboard pattern 0.5mm deep. The pattern should have nice sharp edges. Overexposure will result in the pattern closing in on itself making the recesses look smaller or rounded.
Test #5 - Basic Accuracy Test 2: This test includes 3 columns of holes that are 1mm, 0.5mm, and 0.3mm in size. We like to see all holes visible if possible. Overexposure will result in the holes partially or entirely closing. If your 0.3mm or 0.5mm holes are not visible, consider reducing the exposure time to help increase the detail of your prints, but do not reduce to the extent that tests 1 or 2 fail.
Examples
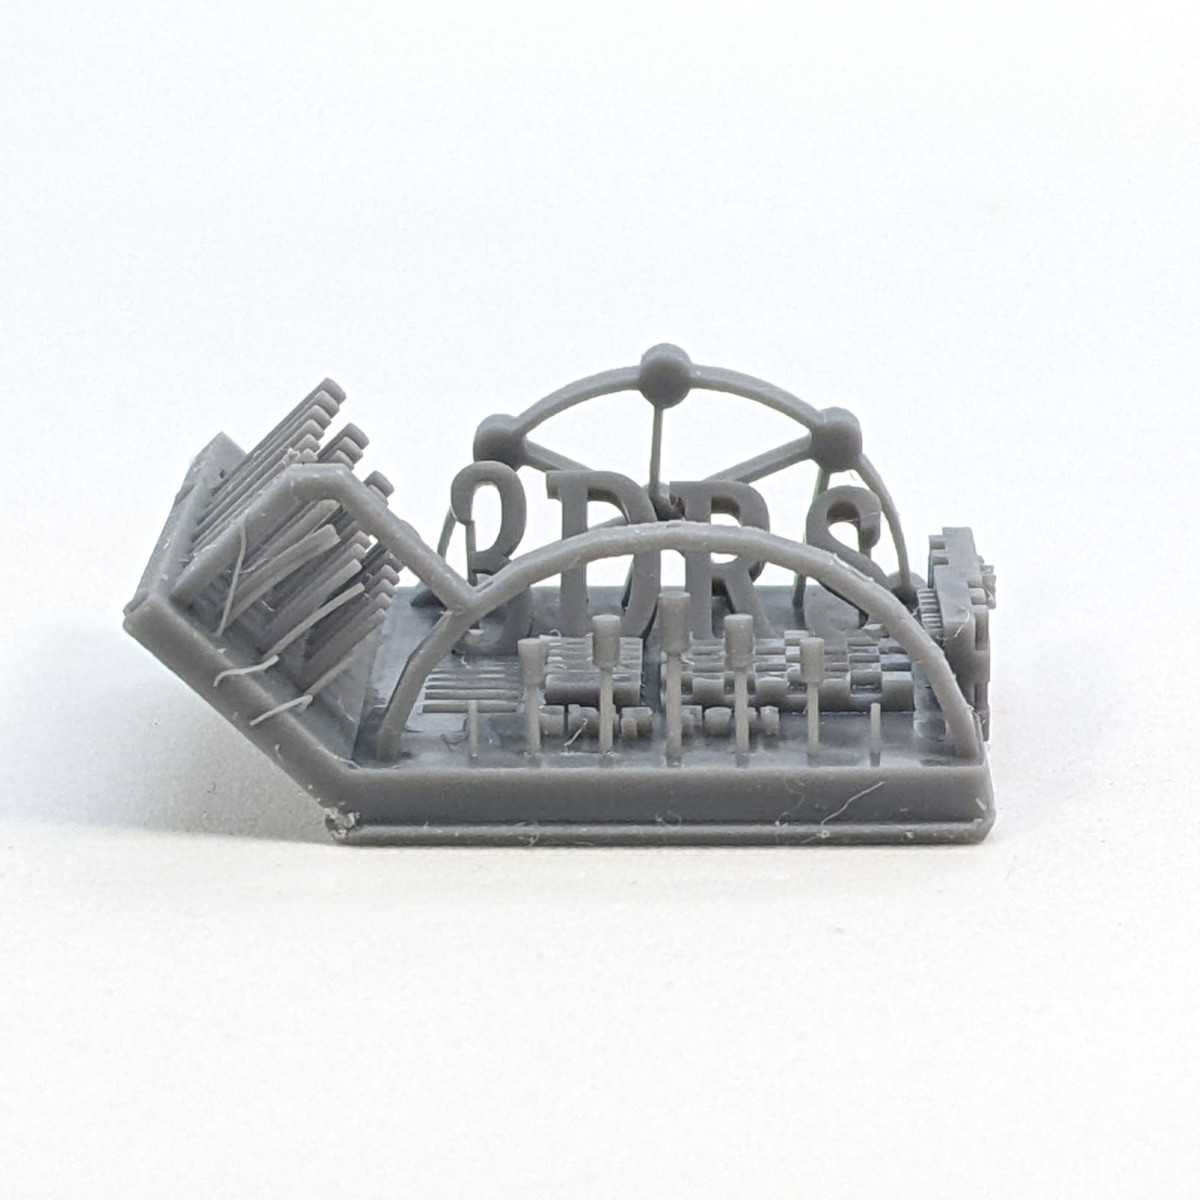
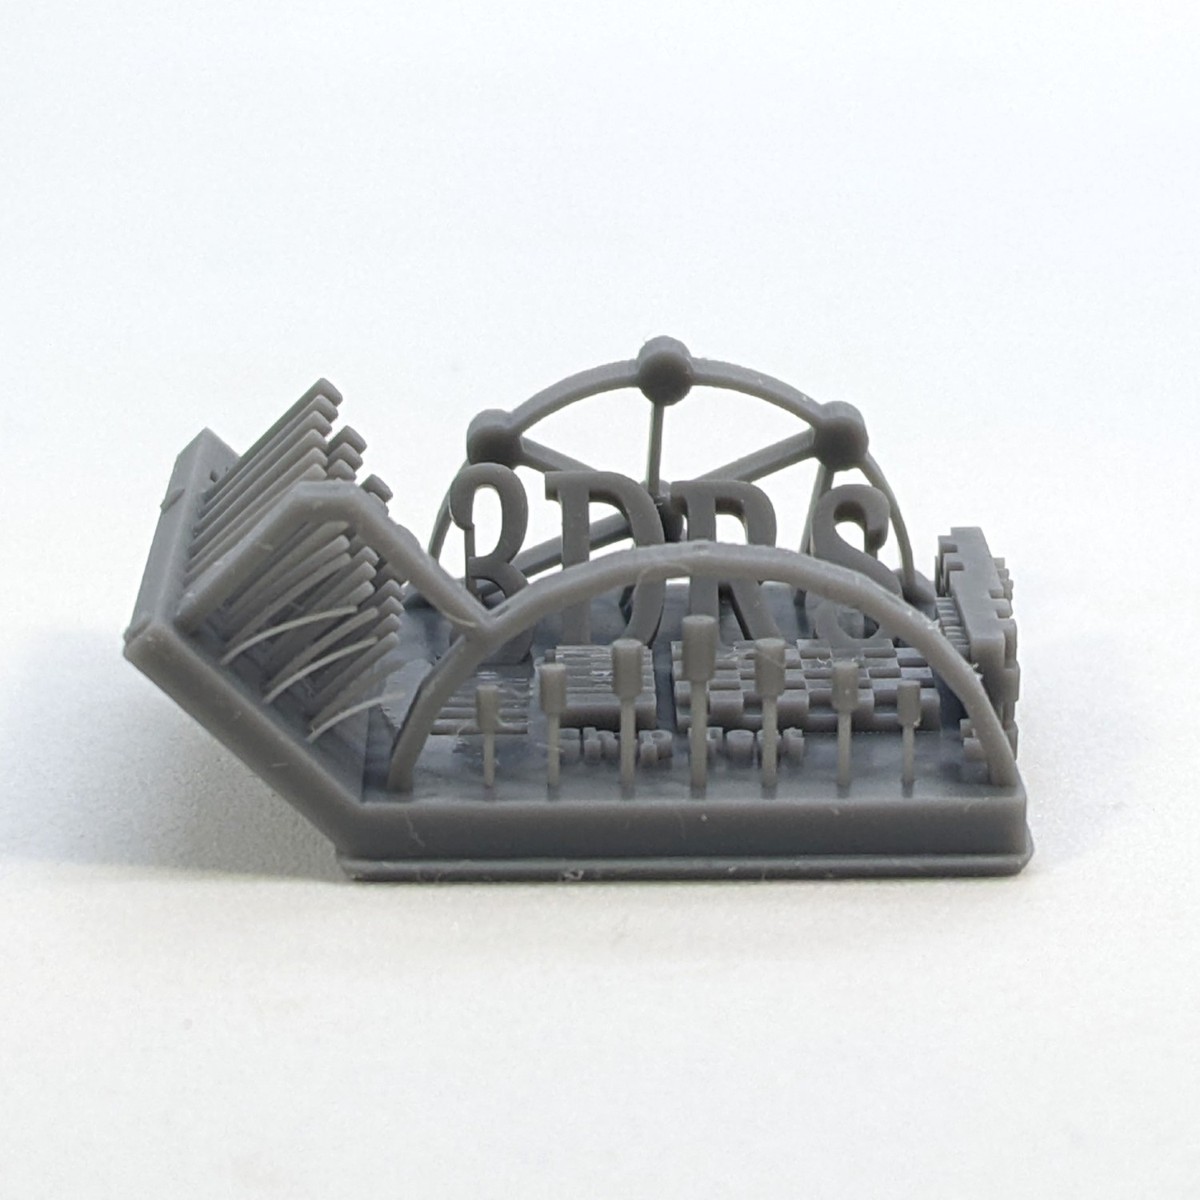
Underexposed
The small pillars are not holding their form and the hammer tests have failed.
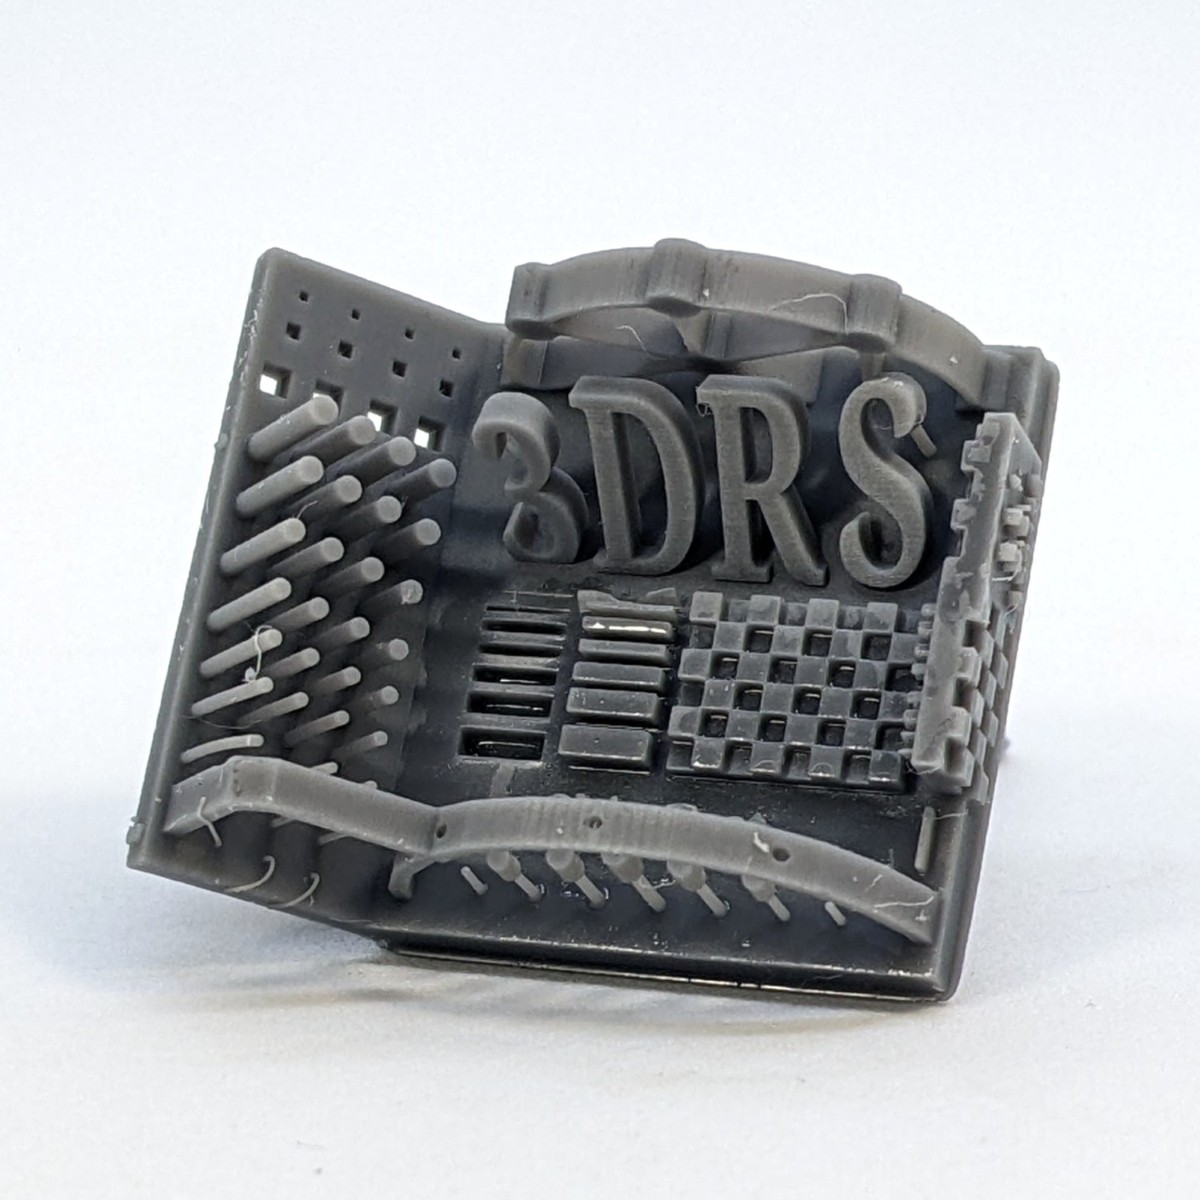
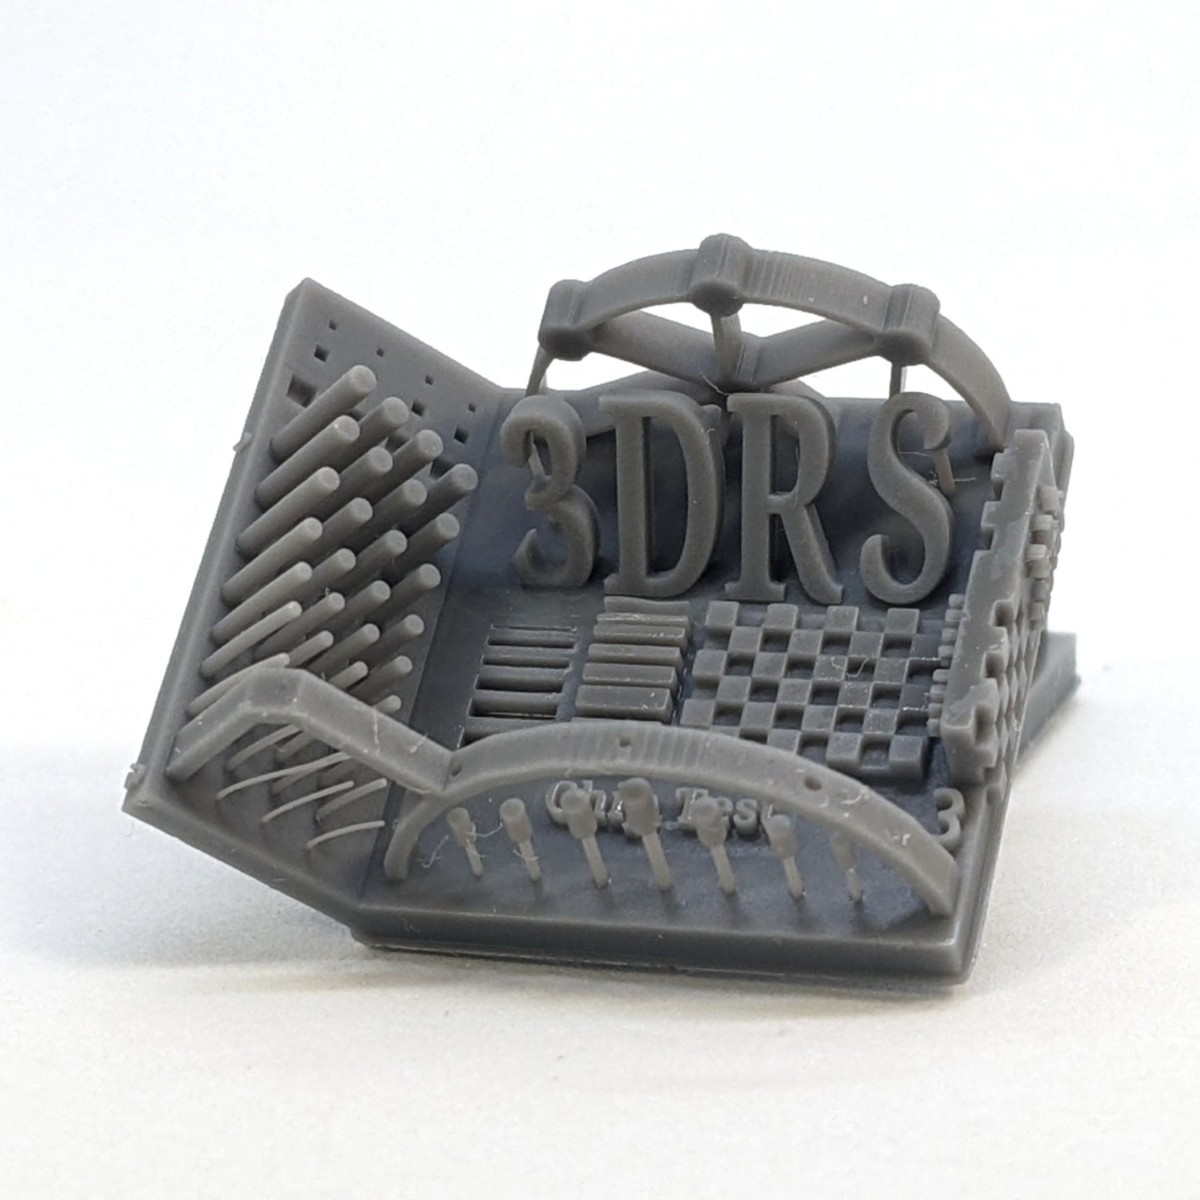
Overexposed
Although the pillar and hammer tests passed, the 0.2mm accuracy test has disappeared and the raised accuracy tests have begun merging together.
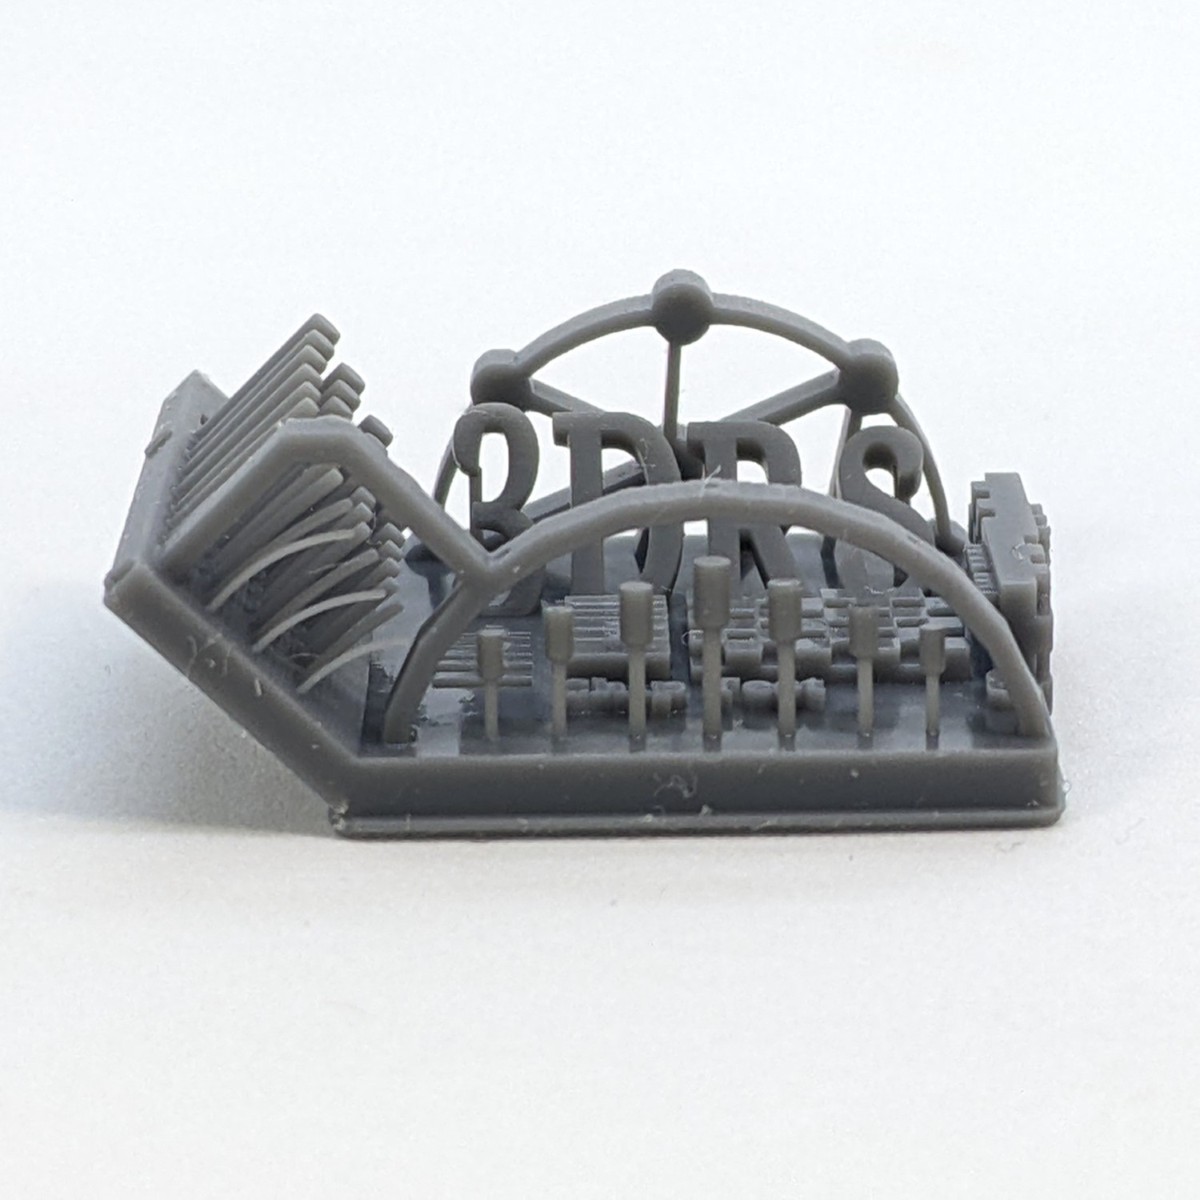
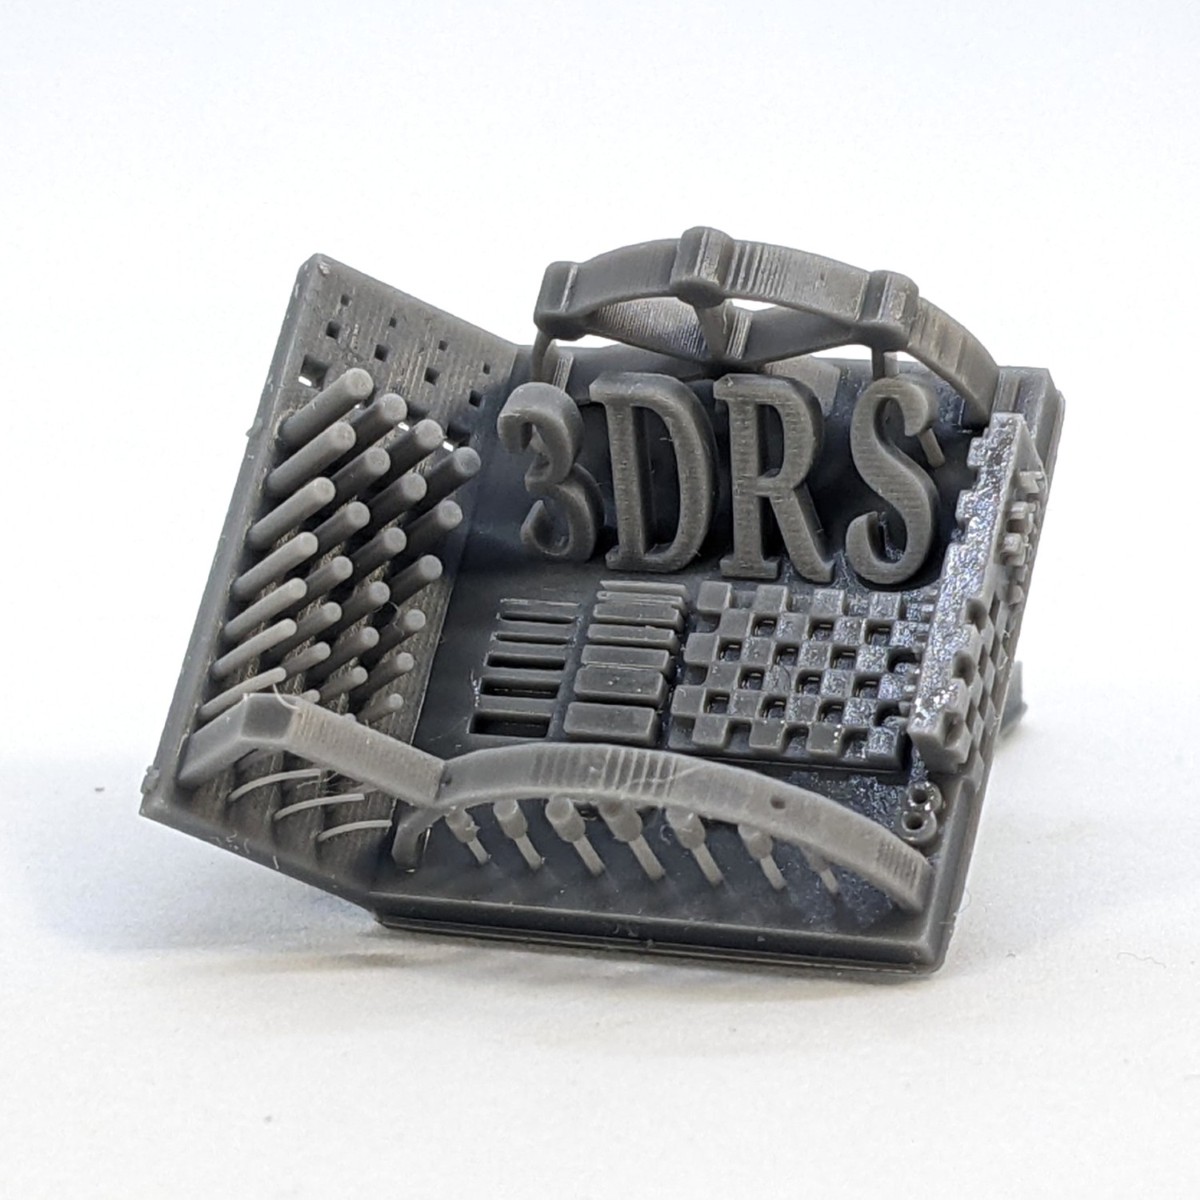
Good Exposure
The pillar and hammer tests have passed, and the 0.2mm accuracy test is still visible. This indicates a good balance between printability and detail retention.
Tips
- After finding the correct exposure time, we recommend adding 0.1-0.2 seconds to help increase your success rate.
- If you notice signs of layers shifting or parts detaching from supports, first check to make sure you are using large enough support tip diameters. If so, increase your exposure time by 0.1-0.2 seconds.
- Overexposing your prints will increase your success rate with the trade-off of losing some detail and accuracy. The final settings you use should be based on what your highest priorty is.