
Tutorials
3D Builder has the most reliable mesh repair option out of all the free software we have tested. If it is not already installed on your Windows machine, you can download it here: 3D Builder Store Page.
We strongly recommend repairing and merging your files before supporting and slicing them.
-
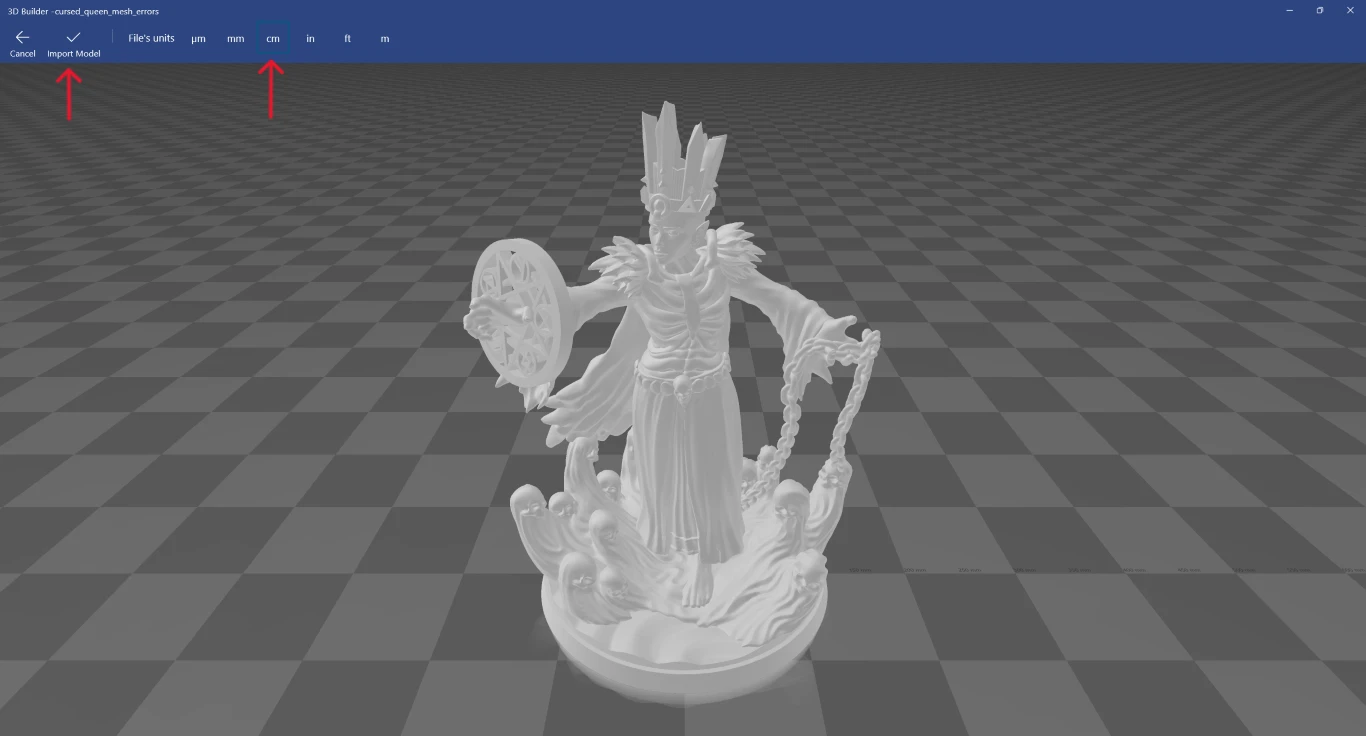
Open the file in 3D builder, and make sure the units are set to CM when you import (we'll scale it back down to MM later).
-
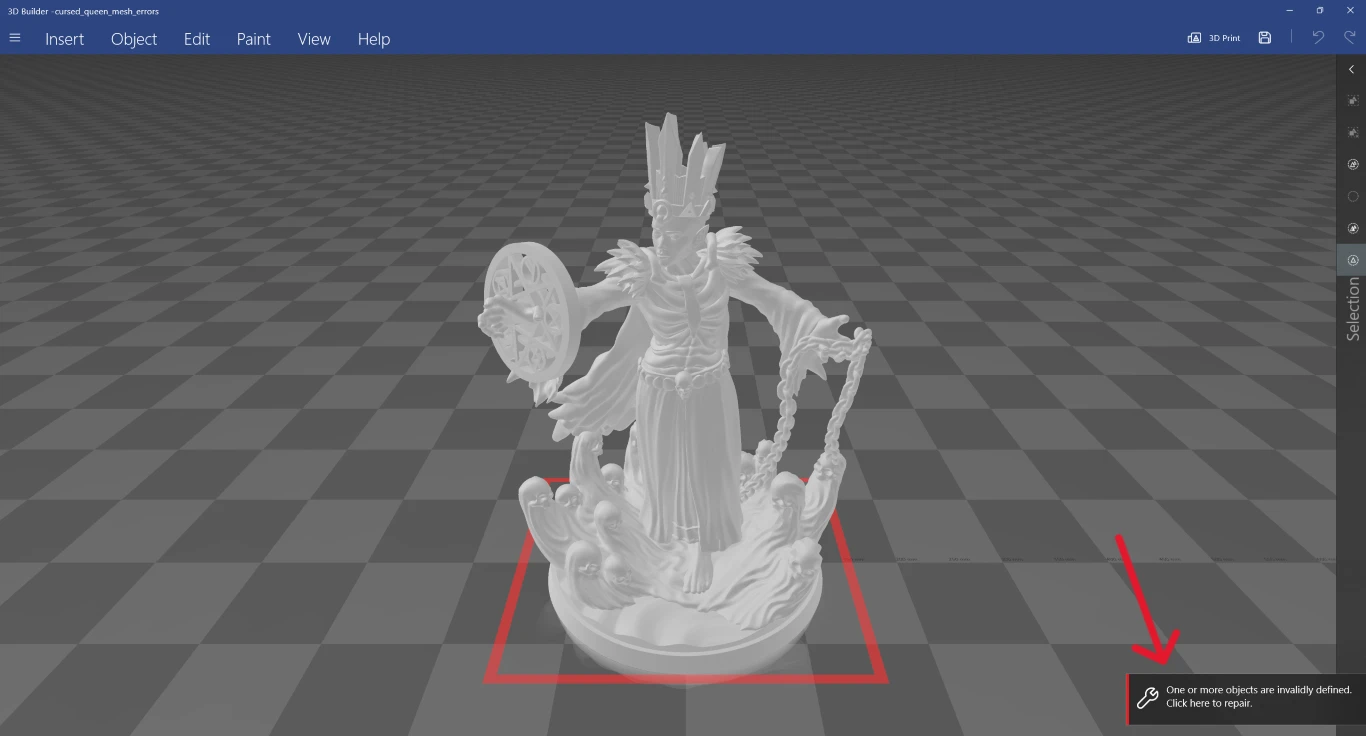
If the file has errors, click on the repair dialog box. This can take a few minutes depending on model complexity.
-
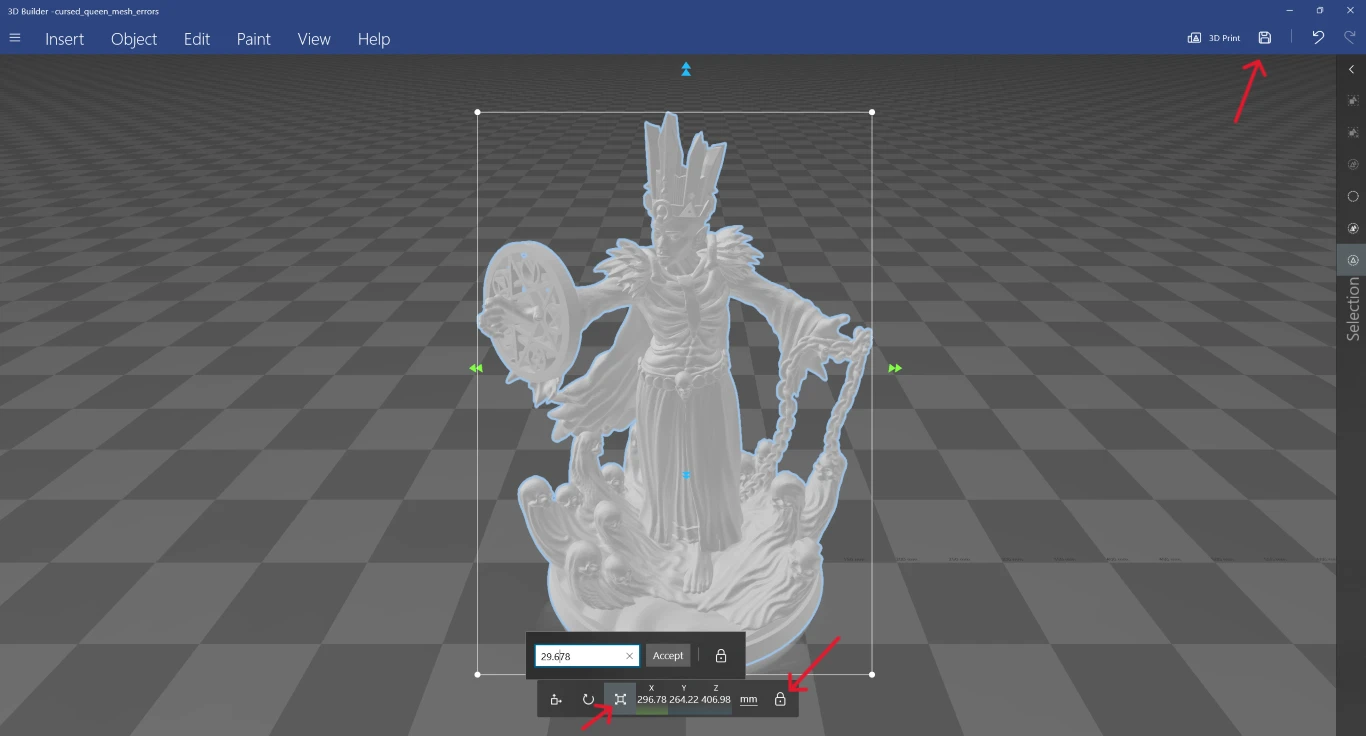
After the repair has finished, scale the model back down to the original size (10%, or one decimal place if you imported in CM) and save.
Note:
If no repair dialog box displays when you open your file in 3D Builder, then no errors were detected with your file. We still recommend using the Merge command for multi-shell meshes, which will optimize your file size and prevent slicer software from falsely flagging your file as needing repairs.
Hide SectionWe recommend merging multi-shell meshes into a single-shell mesh before printing them. Doing so can fix mesh errors, optimize your file size, and prevent slicer software from inaccurately detecting mesh issues.
-
Open the file in 3D Builder, and make sure the units are set to CM when you import (we'll scale it back down to MM later).
-
Select the model, switch to the Edit tab, and then click on the Merge function. This can take a few minutes depending on the model complexity.

-
After the merge has finished, scale the model back down to the original size (10%, or one decimal place if you imported in CM) and save.
When enabled, the 'Clip Below Ground' setting visually hides any part of the model below the ground.
For physical miniature orders, any part of a character that is below the ground will be clipped off.
For digital downloads, no clipping is performed -- the file will download with the entire model including parts below ground level.
Pro tip: you can use 'Clip Below Ground' to help make your custom posed characters stand flat. With Clip Below Ground enabled and the base removed, rotate the camera below your character and adjust your pose until you can see each foot (or point of contact) partially clipped.
Saving characters in TitanCraft operates like most other computer programs. In the menu in the lower right of the Character Creator, you will find the options to Save, Save-As and Rename your character. You can also use shortcut keys which we have listed below.
- Save (ctrl+s): saves the character. If it is the first time you are saving the character you will be prompted to enter a name.
- Save As (ctrl+shift+s): saves the current character as a new character with a new name. This creates a new save file and does not affect the original character.
- Rename (ctrl+r): renames and saves the current character with the updated name. This does NOT create a new save file and will overwrite the original character.
Have a question or suggestion? Chat with us on Discord or email us at support@titancraft.com.